Setting Up Your Nappy Changing Station: What You Actually Need (And What You Can Skip)
A practical guide to building a nappy changing station that works for real life, from essential kit to the stuff that just collects dust.
Here is a number that will make you blink: the average baby goes through roughly 5,000 nappy changes before they are potty trained. Five thousand. That is a lot of time spent standing in one spot, reaching for wipes, fumbling for cream, and wondering where the clean muslin went.
Which is exactly why your nappy changing setup matters more than most people think. Get it right and those 5,000 changes become autopilot. Get it wrong and every single one feels like a small logistical challenge you did not sign up for.
The good news? You do not need to spend a fortune or fill a room with gadgets. You just need the right things in the right place. Here is how to set it up properly, what to spend on, and what you can happily leave on the shelf.
The Big Decision: Dedicated Changing Table or Not?
This is the question that launches a thousand Mumsnet threads, and there genuinely is no wrong answer. It depends on your space, your budget, and how you feel about bending down.
A dedicated changing unit gives you a comfortable, waist-height surface with storage underneath. If you have a nursery with room for one, it makes those early weeks significantly easier on your back. Most models double as a chest of drawers once your baby outgrows nappies, so the investment carries on.
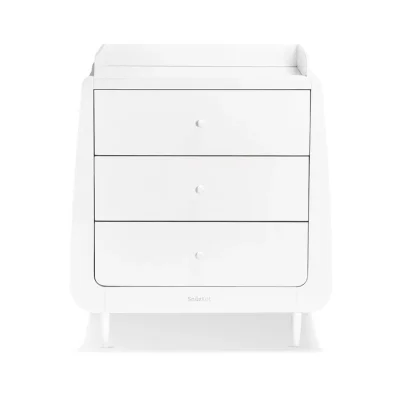

If a separate unit is not in the budget or you are tight on space, a changing mat on top of an existing chest of drawers works beautifully. Just make sure the surface is wide enough, sturdy, and that you have a non-slip mat underneath. Plenty of parents swear by this approach and never look back.
And then there is the floor gang. A changing mat on the floor means zero risk of rolling off anything, no furniture to buy, and total flexibility about where in the house you do nappy changes. The trade-off is your knees and lower back, especially in the early weeks when you are already exhausted.
The Must-Haves: What Actually Earns Its Spot
Whatever surface you choose, these are the things you want within arm's reach. And we do mean arm's reach. Once your baby is on that changing mat, one hand stays on them at all times. If you are walking across the room for supplies, something has gone wrong with the layout.
Nappies (obviously)
Keep a stack of at least 10-15 within grabbing distance. Newborns go through 10-12 nappies a day, so running out mid-change is a real possibility if you are not topping up regularly. A caddy or basket is your best friend here.
Wipes or cotton wool and water
For the first few weeks, midwives often recommend cotton wool and cooled boiled water for newborn skin. Once your baby is a bit older, a good-quality fragrance-free wipe does the job. Either way, have them open, ready, and positioned where you can grab one without looking.
Nappy cream
You do not need to use barrier cream at every change, but having it right there means you will actually use it when you spot early redness. Prevention is so much easier than treating full-blown nappy rash at 2am.


A natural barrier cream like Kokoso's Happy Nappy Cream is a lovely option. Gentle ingredients, no nasty chemicals, and it smells genuinely nice rather than clinical. But honestly, any zinc-based nappy cream does the job. The important thing is that it lives on your changing station, not in a bathroom cupboard two rooms away.
A changing mat
Whether you go for a wedge-shaped mat that sits on a unit or a flat roll-up mat for the floor, you want something wipeable, comfortable for baby, and ideally with raised sides to contain any mid-change surprises. Trust us, there will be surprises.
Muslins or old towels
Tuck a few muslins under the changing mat or in a basket alongside. They are your emergency backup for everything: unexpected wee fountains, spit-up, spillages, and improvised padding. You can never have too many muslins. This is not an exaggeration.
Nappy bags
Somewhere to put the used nappy before it goes in the bin. Scented or unscented is personal preference, but have a roll or box within reach. Some parents skip these entirely and go straight to the bin, which is also fine if your bin has a good seal.
The Nice-to-Haves: Worth It If They Fit Your Setup
These are the items that are not strictly essential but can make life noticeably smoother.
A nappy bin
You can absolutely use a regular pedal bin with a lid and empty it daily. But a dedicated nappy bin with odour-locking technology earns its keep surprisingly fast, especially in warmer months when smells escalate quickly.
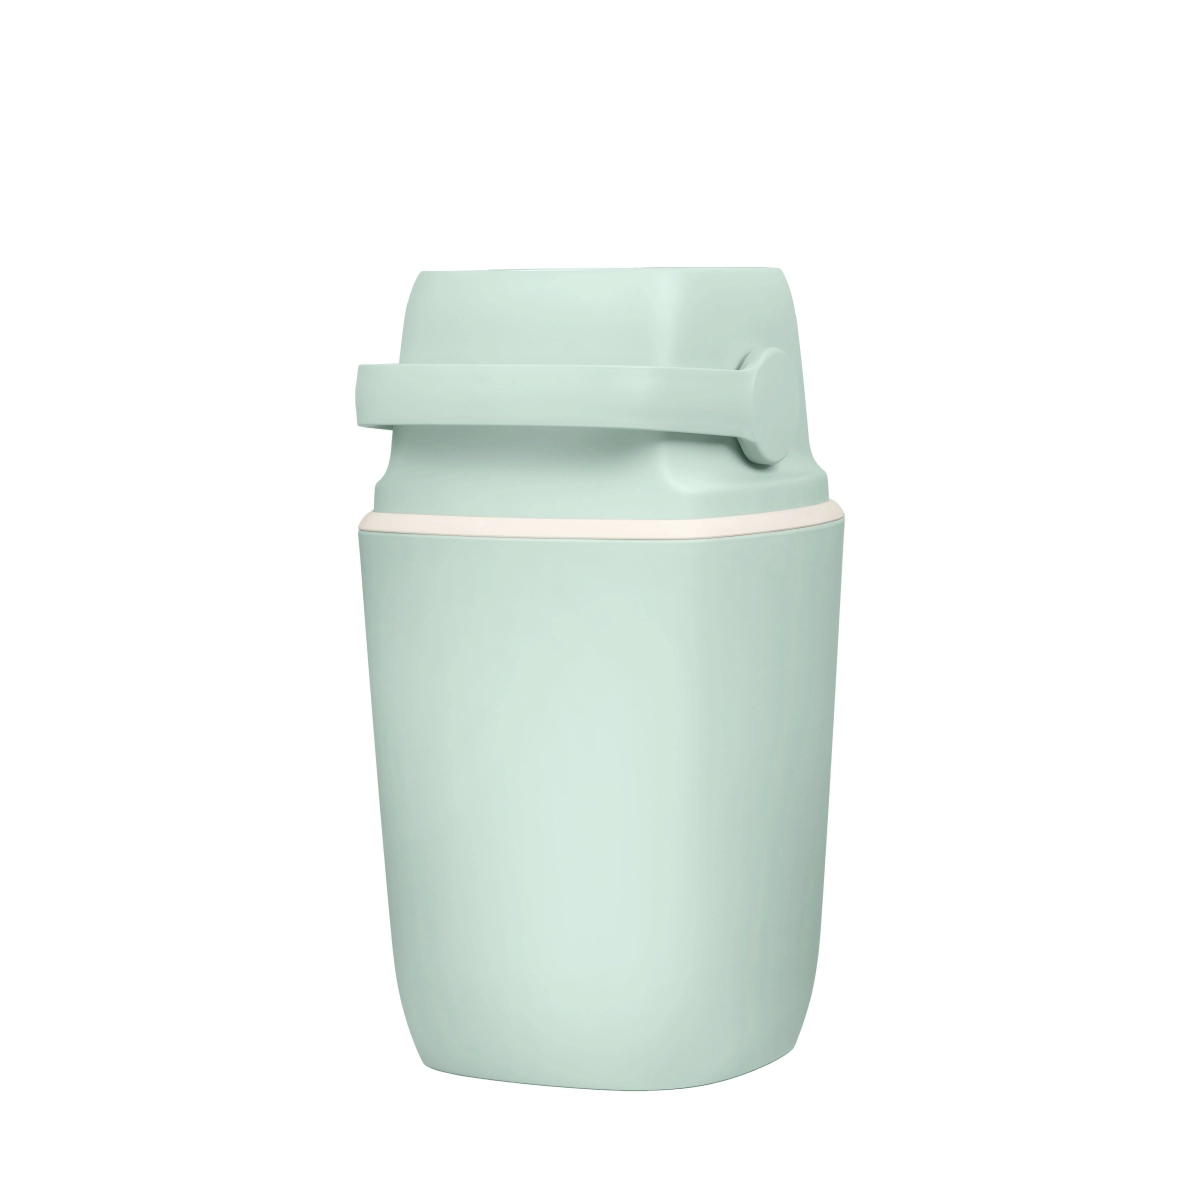
The AirWell Eco Design bin is worth a look if you want something that does not scream "nappy bin" in the corner of your nursery. It uses standard bin bags rather than expensive proprietary refill cartridges, which saves you a small fortune over time. And it genuinely locks in smell, which is all you really want from a nappy bin.
A nappy caddy or organiser
A portable caddy with compartments for nappies, cream, wipes, and a spare outfit is brilliant if you change nappies in different rooms. You just grab the caddy and go. Some parents start with one in the nursery and one downstairs, which is honestly genius if you live in a house with stairs.
A spare change of clothes
Keep a vest, a sleepsuit, and a pair of socks tucked into your changing station. Blowouts happen, and they always happen when the clean laundry is downstairs. Having a backup outfit right there saves a surprisingly stressful scramble.
Hand sanitiser or a small pump bottle of hand wash
Not essential if your changing station is next to a bathroom, but extremely useful if it is not. A quick pump of sanitiser after a nappy change saves you a trip to the sink every single time.
What You Can Happily Skip
This is where the baby industry gets a bit enthusiastic with your wallet.
Wipe warmers. They exist, they are marketed aggressively, and roughly zero parents we have spoken to used theirs for more than a week. Your baby will be fine with room-temperature wipes, we promise.
Nappy stackers. A fabric pouch that hangs on the wall and holds nappies vertically. In theory, elegant. In practice, they hold about eight nappies and you have to refill them constantly. A basket or drawer does the same job with less faff.
UV sterilisers for changing mats. A wipe-down with a damp cloth after a messy change is all you need. Your changing mat does not require hospital-grade sterilisation between uses.
Designer nappy bins with proprietary refills. Some nappy bins lock you into buying specific refill cassettes that cost a surprising amount per year. Check the ongoing costs before you commit. A bin that takes standard bags is almost always the smarter long-term choice.
The Downstairs Station: Your Secret Weapon
If your home has more than one level, do yourself a massive favour and set up a second, smaller changing station downstairs. It does not need to be elaborate. A changing mat, a small basket with nappies, wipes, cream, a couple of nappy bags, and a spare outfit is all you need.
The number of times you will avoid carrying a baby upstairs for a routine nappy change makes this tiny investment worth every penny. Some parents use a dining table (with a mat), a sofa, or even the floor. No judgement, whatever works.
On the Go: Your Changing Bag Essentials
Your beautiful home setup is useless the moment you walk out the front door, so you need a portable version too.
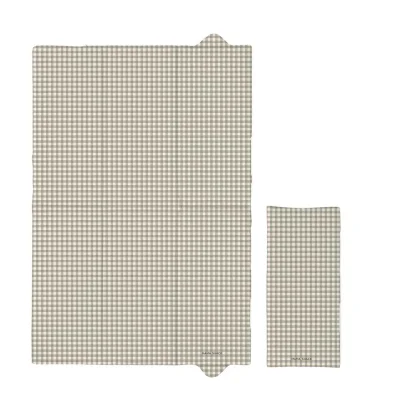
A foldable travel changing mat like the Mama Shack is compact enough to live permanently in your changing bag. Public changing facilities vary wildly in cleanliness, so having your own mat means you always have a clean surface. Look for one that folds small, wipes clean easily, and has a pocket for a couple of nappies and wipes.
For your changing bag itself, keep it stocked with:
- 5-6 nappies (more for longer outings)
- A travel pack of wipes
- Nappy bags
- A small tube of barrier cream
- One full change of clothes, including socks
- A muslin (or three)
Restock the bag the night before rather than scrambling to do it while your baby is crying in the car seat. Future you will be grateful.
The Layout That Actually Works
However you set up your station, the golden rule is this: everything within one arm's reach, because one hand is always on the baby.
Think about it like a cockpit. Nappies and wipes to one side, cream and muslins to the other, nappy bags and bin within tossing distance. You want to be able to do an entire nappy change without turning your body or taking your eyes off your baby for more than a second.
If you are using a changing unit with shelves, put the things you use every single change (nappies, wipes) on the top shelf or in the most accessible basket. Cream, spare clothes, and extras go on the shelf below. Anything you only need occasionally goes further away.
Give it a trial run before baby arrives. Stand at your changing station, close your eyes, and reach for each item. If you cannot find the wipes without looking, rearrange.
One Last Thing
Your changing station does not have to be Pinterest-perfect. It does not need matching baskets, colour-coordinated labels, or a framed print above it. It needs to work. The most effective changing setups we have seen are the ones built by parents who prioritised function over aesthetics, then made it look nice afterwards if they felt like it.
Set it up, try it, adjust it after a few days when you realise the wipes should be on the other side. That is completely normal. Five thousand nappy changes is a long stint, so you might as well make the workspace comfortable.
Building your registry? Add your changing station essentials to your BubsNest wishlist so the people who want to help can grab exactly what you need. No duplicate nappy cream, no mystery gifts, just the stuff that will actually make those first weeks smoother.
Ready to Create Your Baby Registry?
Start your free baby registry today and share it with friends and family.
Get Started Free